
11:44 AM
Mark McLaughlin's WELLINGTON, as played by me at WBC 2005
Wandering in from a gigantic feast at the GOOD N' PLENTY, I passed Mark in the early throes of his new WELLINGTON game from GMT. Mark was playing the titular character of the game. He waved me over to give it a try-- not that he had to try very hard, Mark is a great GM and a gentleman. I had purchased Wellington, but had no time whatsoever to do anything but fondle it (in a nice, healthy way) after purchase. I looked forward to playing it in real time, against other humans. I really like NAPOLEONIC WARS, which is heavier on the diplomacy and "grand scale" events than WELLINGTON, and better suited to a lot of players. WELLINGTON is a game in a much more narrowly focused geography (Iberia versus Europe) and terrain is therefore a limiting factor. Outside event cards DEFINITELY have the same (amusing, semi-catastrophic) effect as in Nappy Wars, however.

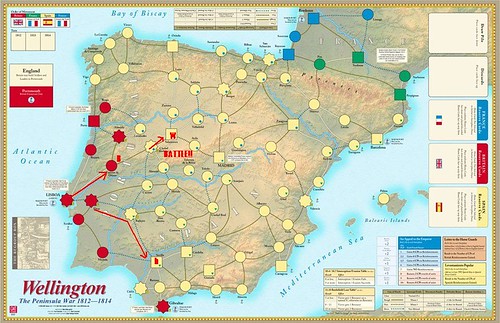
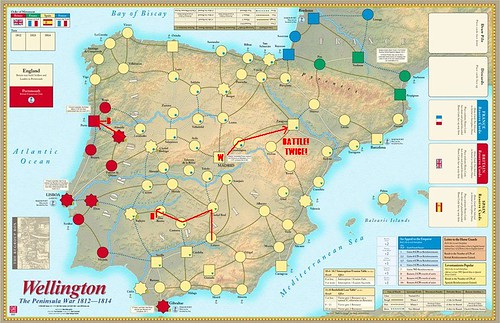
Here we are at game start. NOTE BENE! I did not keep close tabs on all positions-- I have a better idea of how *I* did as Wellington than I do of even my Spanish Ally player. So I'll speak of the other players' movements in generalities.

WELLINGTON at Ciadad Rodrigo, BERESFORD and HILL back in Portugal. I didn't really use them for the first couple of turns.
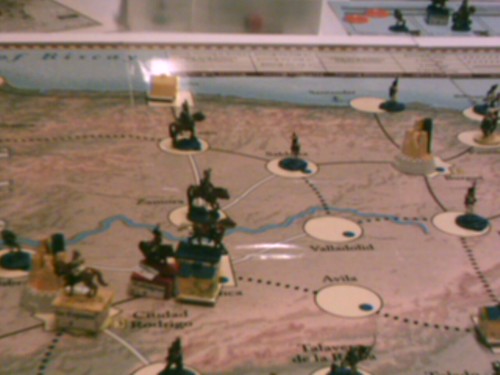
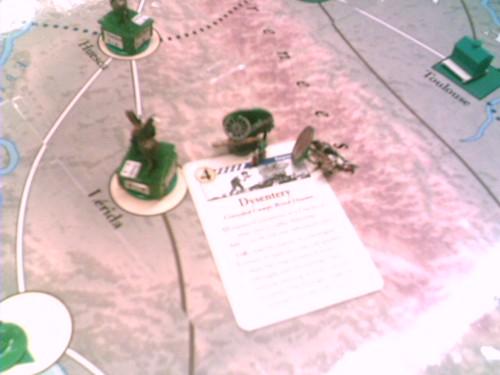
Mark used 15mm Old Glory nappy miniatures, for the most part.
In general, early in the game the French Armee du Nord (the Blue player) was firmly entrenched in Salamanca, with a lame general leading his army. We were at rough parity, (Brits slightly higher) so I did the stupid thing and attacked. With plus five for having Wellington along, plus one for being British, minus one for terrain, I ended up rolling 12 dice. 8 of the hit!!!! In a stroke, I had annihilated that army and put that general out of the game.
Too Bad, so Sad! That's the fortune of War
The same again, only a tad more clear...
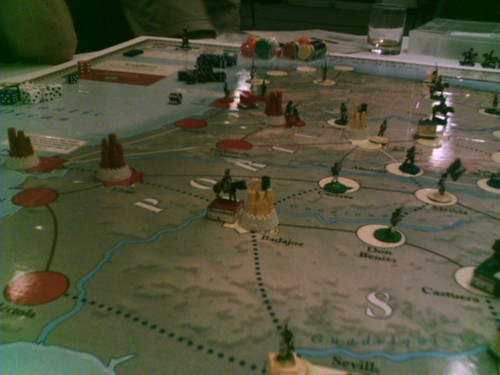
Meanwhile, one of the Generals of the Armee del Sud (Suchet) was threatening my flank. Here he is now, sweeping up troops for an attack on Cadiz, using the Duke of Damnation card. I sent troops to support my Spanish ally defend, and later sent Hill down there. Andulasia must be taken and held for the Spanish!!

After the Salamanca bloodbath, the next obvious step for Wellington was to take Madrid. This plays into the victory conditions. If the Crapauds control Madrid they can claim an early total victory condition so it's a good idea to deny them the capital. The problem was getting through Avila (see the little area to the right of Salamanca there?) It's a mountain pass, which would mean that I would have to roll for losses coming over the mountains. I took some losses at Salamanca so I needed every guy. What to do? Fortunately I had a flanking card that allowed me access through the mountains, so my tired little army headed into Madrid!

Fortunately, Wellington was up against Joseph, not much of general to begin with, but up against Wellington he's almost a foregone conclusion. But he WAS on the defensive, and he DID have a lot of guys to start with, and he DID roll well. So it was a bit of a bloodbath. I ended up occupying Madrid with only one soldier left. Fortunately my valiant Spaniard allies backed me up QUICKLY. They were there to take casualties.

Meanwhile, the campaign to clear Andulasia (South of Madrid down to the Med) began in earnest, and was quite succesful. I sent "Daddy" Hill down with a Four-Sized army to clear out a series of French garrisons, displacing the Army of the South's (green player) only General in the region, basically chasing him back to Badajoz.
The Armee du Nord (blue Player) was sweeping West on the River Tagus (the big horizontal river crossing Spain in the middle, just North of the Ciadad Rodrigo-Salamanca-Madrid line. That river was both a blessing and a curse-- virtually impossible to cross without losses unless you controlled both sides of it, and the French North army held the other side most of the game. So, ultimately, I sent Beresford, my number 2 general, in his direction, after failing at besieging Badajoz.
The siege was a bad idea, even if for the victory key. So up North Beresford went to intercept the Western sweep of the Northern Army of Marmont.
At this point, Mark arranged for the bartender to bring us shots of Curvosier. We made quite merry indeed!
At this stage, I was wrapped up chasing the last Armee du Sud general around Andulasia with Hill, and attempting to besiege Badajoz with Beresford. I strengthened Wellington at Madrid for the last big push. The Armee del Sud armies had been pushed back to the starting line at the Pyrennes, but a big force wias building up under Suchet from the green army. My Spanish ally used his best general to retake some of the lost ground along the coastline, and played perhpas the funniest card result in the game: Dystentary. An entire army got wiped out, you might say. They couldn't handle that crap.
Actually, I think Suchet survived unscathed, and they rebuilt again.
At this point I wanted to get at least ONE MORE KEY to really be sure of a win, and it wasn't looking good. The next one in line was Saragossa... currently held by Soult, the best leader the French had, period. And I would have to cross a mountain, which was a penalty, and fight on the offensive. Oh well, no balls, no blue chips. My first attack was repulsed with light losses. I regrouped and came back.. the second one was rebuffed with heavy losses. At that point, it was the end of the last year of the game, and we had to count out the victory as there was no sure victor.
It turns out the Northern (blue) player won, but only by ONE KEY. My thoughts are this: I had a great time playing, it was a hell of a lot of fun, and I don't know what I could do that I didn't do. I was just unlucky at Saragossa, that's all. I really feel that I would have been over the mountains and into France had I won there.
SUMMARY: This was my first game of WELLINGTON, and it made me glad that I had purchased it. I like it about the same as The Napoleonic Wars, which is to say, quite a bit. There's very little diplomacy to WELLINGTON (except that which is implied on the strategy cards), which is the big difference between both games. Combat (IIRC) is roughly the same, but representing two very different scales. Terrain is a factor in both games, but it's a HUGE factor in Wellington-- the river crossing rules were a dominating factor in the game I played. I couldn't really come to grips with the Armee Du Nord (blue) army except in those places where he ventured south of that big East-West river.. so once I wiped out blue in the south my choices were to move AROUND the river, which I didn't have time to do, or suffer huge losses trying to cross the river onto a contested space. So blue was facing mostly one man Spanish garrisons north of the river, and with Marmont leading them, he cleaned house (and got that one extra key he needed to win). The cards are more tactical than in TNW, and there are FAR more "response" cards which an intentional part of the design.
WELLY is worth the $$, ladies and gents... we had a fantastic time playing it at WBC. There were some hilarious results from the card play which were very much in keeping with what I know about the Penninsular War (which is considerable). An entire army group is decimated with dysentary at one point, and in another, Spanish partisans wipe out the last vestiges of Suchet's army in Andulasia. It's a great design, with lots of free flowing action and "take THAT" kind of interplay. Congrats to Mark for a job well done.